Over the next couple days, we are going to work on setting up our Supabase account, create a user table and some columns as well as some RLS policies, then work on Flask routes for signing up, logging in and out, as well as resetting the password and updating account information.

It’s a lot, so we are splitting it up. Today, we are focusing on the stuff that can be done on the Supabase website: https://supabase.com/.
If you don’t have an account yet, click on the green “Start your project” button. It may take you to the sign in page, at least that’s what it did in Incognito/Private mode across three different browsers for me. So, either that’s the default behavior, it it’s tracking me by IP address. If you do get the sign-in page, just scroll to the bottom to find the sign-up link.
Create an Organization
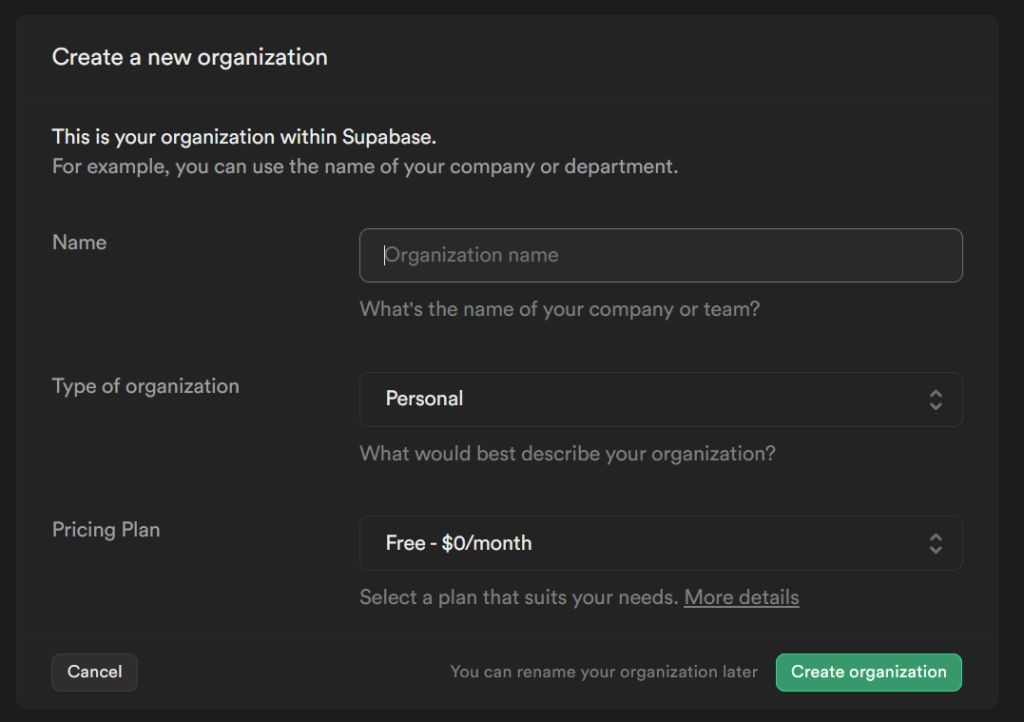
Once you are in, you will need to create an organization. Don’t worry, it’s very simple, three questions:
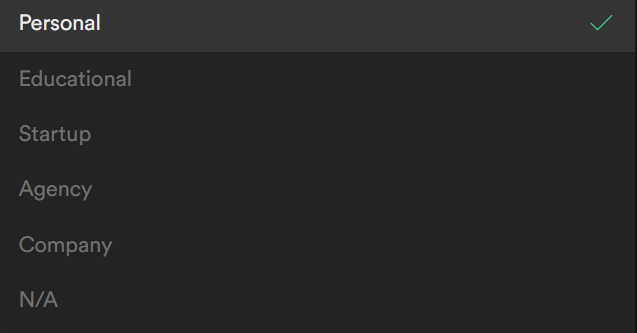
Here are the options for the type of organization. For this site, I’m choosing “Educational.” For ProsePal, it was “Startup”
The free plan will be plenty for now. By the time you’ve grown to the point where 50k monthly active users, 500MB of database, 5GB of bandwidth, and 1GB of file storage isn’t enough, the $25 plan will feel like nothing. But especially for setup and testing, free is well more than you need.
Create a new project
Once that is done, it’s time to create your project. That’s right, by clicking another green button. Points for consisting branding!
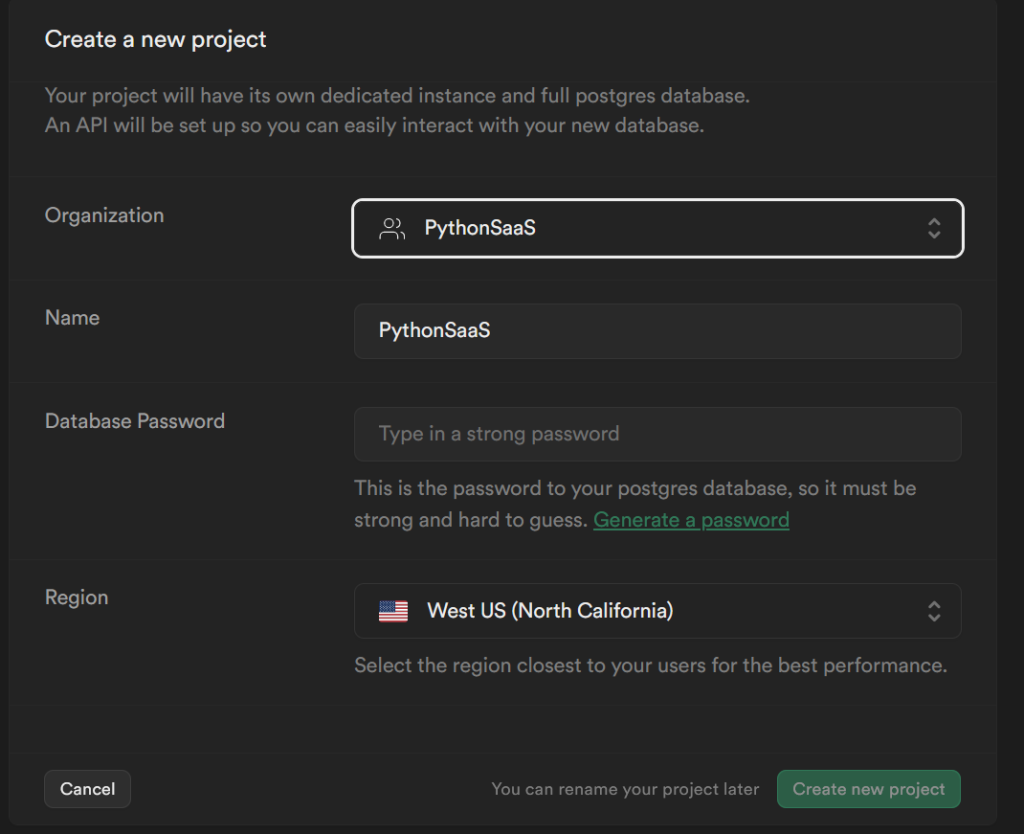
Every time I go to this pane, my browser wants to fill in the name field with my login email. I guess it sees the password field and thinks I’m trying to log into the site.
You could use their password generator or your browser’s. We only really need the database password if we are using the connection string, which is not how we connect through the Supabase library, but I’m putting it my .env file just in case. Special characters can be problematic in strings, so I just use secrets.url_safe to generate a password, just like we did for the FLASK_SECRET_KEY on day one. Twelve characters is plenty here.
Supabase project API
Once the project is created, we are going to ignore the green button. That is going to give us the connection string, and like I said, not what we are using. Instead, scroll down until you see “Connecting to your new project“
![screenshot of Project API pane. Text on left says: "Connecting to your new project
Interact with your database through the Supabase client libraries with your API keys.
More information about your project's keys can be found in your project's API settings."
Text on right says: "Project API
Your API is secured behind an API gateway which requires an API Key for every request.
You can use the parameters below to use Supabase client libraries.
Project URL: [form field]
A RESTful endpoint for querying and managing your database.
API key: [form field]
This key is safe to use in a browser if you have enabled Row Level Security (RLS) for your tables and configured policies. You may also use the service key which can be found here to bypass RLS."](https://python-saas.com/wp-content/uploads/2024/03/Screenshot-2024-03-30-173237-1024x351.png)
Copy the Project URL into your .env file as SUPABASE_URL and the API Key as SUPABASE_KEY. These are going to be how you connect to your Supabase database.
In the text below the API key, you will see a link to retrieve your service key. That is different from the public key. The service key can be used to bypass any Row Level Security policies, so that’s your secret API key. Click the link, or if you’ve left the page, you can go to Project settings in the sidebar, and click API in the sidebar that appears to the right of the original sidebar. The service role key will be the one with the red secret tag, and the key will be hidden. Click reveal and then copy. Then save it in .env as SUPABASE_SERVICE_KEY.
At this point, your .env file should look something like this:
FLASK_ENV=development
FLASK_SECRET_KEY=Y8b3fctA0-q-2i49zwCEO4GhtMI9hgr7

# Supabase info
SUPABASE_DB_PW=hNby_3UdqYv1HYFg
SUPBASE_URL=sypohgrlrfyqciocusujb.supabase.co
SUPABASE_KEY=eyrFtFAbiE_sEcL_4Iqj2t8pv9ephK2wrT2ksgVbgB8MvCtzmH98nO_OKul6Xx1dnQr_EG_ePT40NlNXhHOWRDWUZCHQNRP4YUruSpvoIlunKNZsIlaxpT48BXCrrbRjWLkHBUrJz4xZ_5yx1gxxi0fqxPRFdIYApf3TYz37WhFLZoxptop_pBGz0evAjA5gJRrAN53UgvHap07u2BLGJuZ3uXhbOom6TYWJc2hSgmjxwmoPdegjebxjBrp_IOJfhlqdjY8qQCKIgt4I7D4yrA
SUPABASE_SECRET_KEY=eySXZxy_DuZ0yUlh0yde9S5Yh4TAbZTyxz_om0OpiPx38HDCwU1Fu2IH4HUl_v4namnqjPM1IuWAjp6HnvFQ4GcRRkYDnHtboYnBTMBu9VAaR3ILheH1Xe0cwtjEzvFGNIYZ_BxlITwiDx8hCy5zVmACXJFe0BrA0e3fQBy36n3byC41vHVP_wNiT4ueRDtLSHWLgke7CoQeQpp216x0gZEBNPxG1cJCXf2WLMKerPXBVQfzJcmqqvXkivF3ix3fHppgR82zH1u_QYtjHtpHs
note: all strings in this example are randomly generated and not actual keys/url
Now we are ready to start setting up our user table!
Create a Postgres table in Supabase
The easiest way to do this will be to go to the Table Editor in the left sidebar. If you had already created any tables, you would see them in the new sidebar. But for now, there’s just a “New Table” button under the schema dropdown (which you don’t need to worry about, public is the only schema you can create tables for in the table editor). Or there is a green “Create a new table” button in the center of the screen. Click either one.
We are going to name the table users and give it a description that helps us remember what it’s for if we ever forget. We will be using this table to store user profile information.
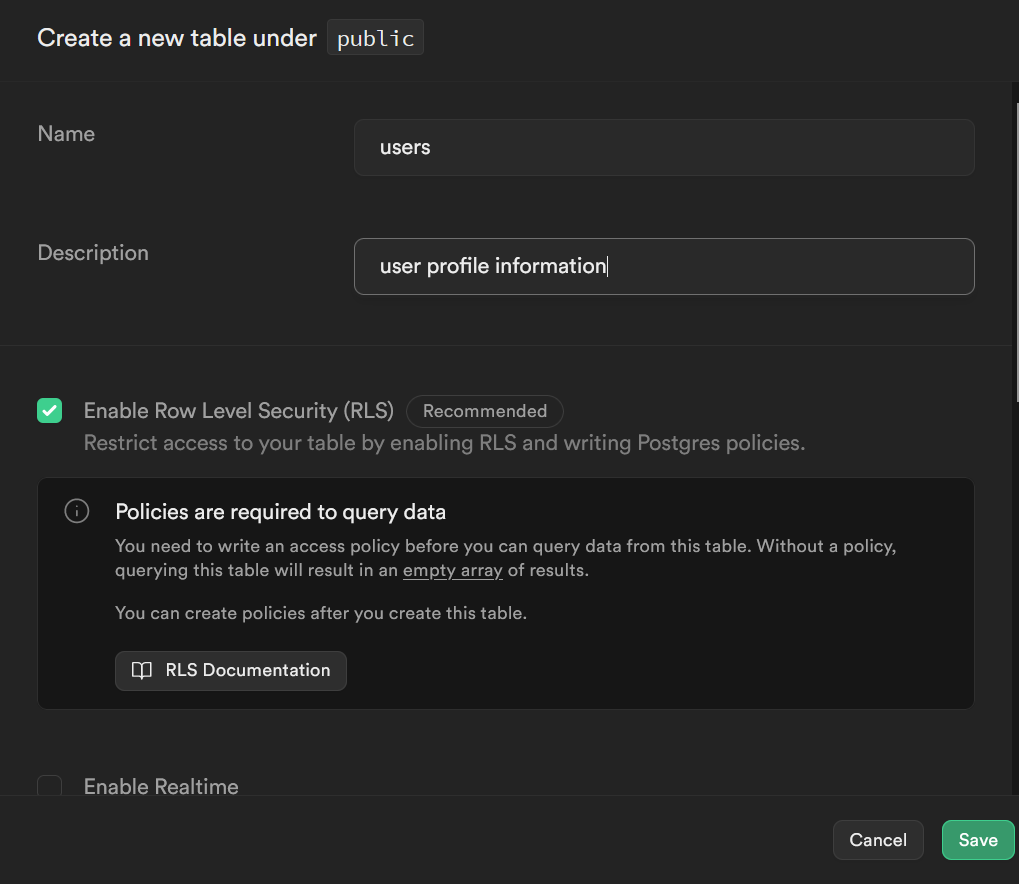
Strictly speaking, we don’t need to create this table yet, or even at all, to use Supabase for user logins. There is a separate schema called auth that will handle that. But if we want to store any other information about the user, that will go in this table. For instance, ProsePal uses a credit based system, where users purchase credits to use the software, and I have a column that stores their balances..
Keep Row Level Security enabled, but don’t worry about enabling Realtime.
Create columns for Postgres Table in Supabase
Don’t be fooled by the save and cancel buttons in the corner. They float, and the page scrolls. Scrolling will reveal a section to add columns to your new table, and foreign key relations.
To start off, it gives you an id and created_at column.
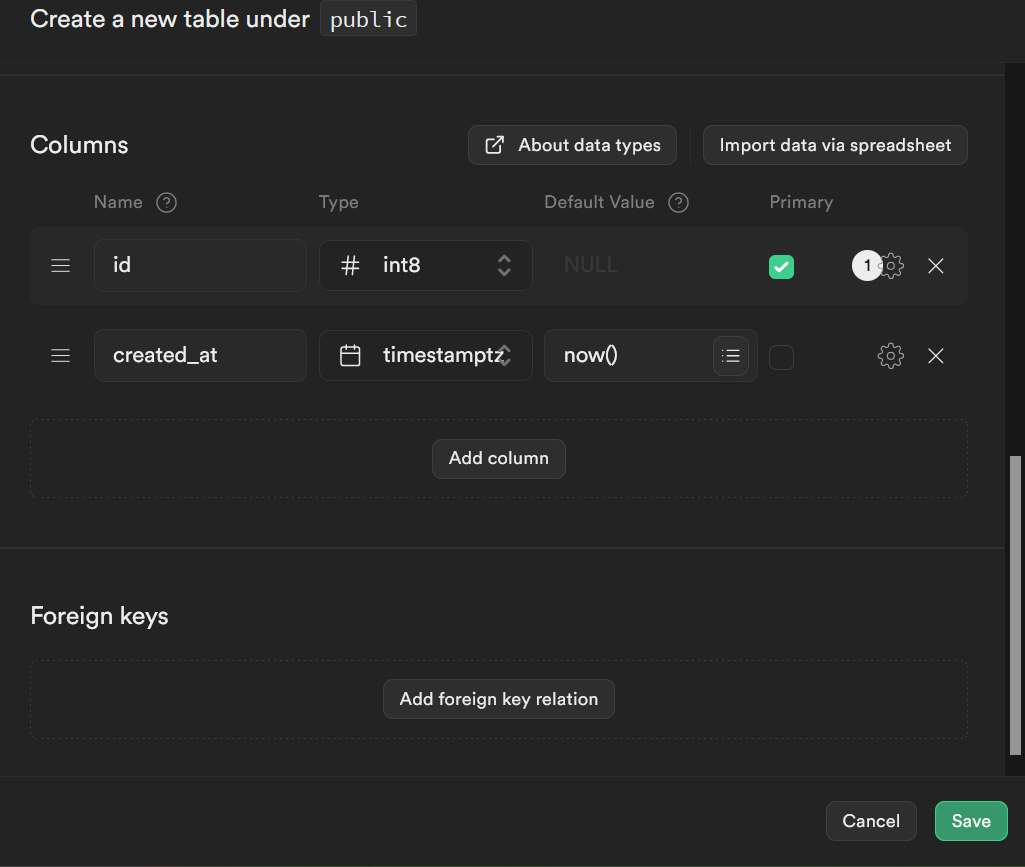
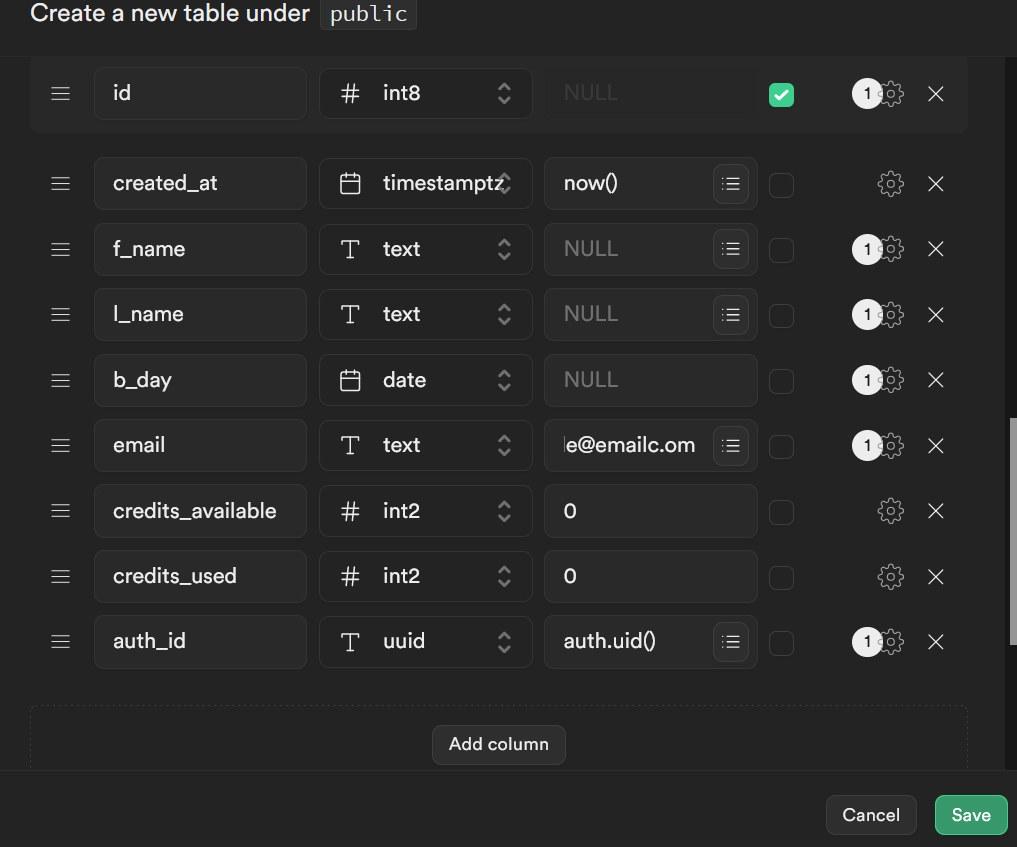
Adjust these to suit your needs, but I’m starting with:
- f_name: with type text and a
NULLdefault value: This will store the user’s first name, if they chose to enter one, but not require them to. - l_name: with type text and a
NULLdefault value. This will store the user’s last name, but will not be required - b_day: with type date and a
NULLdefault value. This will store the user’s birthday if they chose to enter one. Useful if you want to offer some sort of free gift, like a coupon, on their birthday - email: with type text. We are going to enter some text for the default value. It can be anything you want. I made mine “example@email.com” Then click on the gear icon. Make sure “Is Nullable” is de-selected. Since the user is going to log in with their email, they are never not going to have an email address stored. You may be tempted to make the email column unique. After all, there is never going to be more than one user with an email address. But don’t do this unless you are certain that you are not going to need to link to it in another table in a row where it isn’t unique (say, orders, needing an email address to send order information to).
- credits_available: Since I’m using a credit system, I have credits_available as a signed 2 byte integer, which appears in the dropdown as
INT2. A 2 byte integer can store a value up to 32,767 which I think is going to be plenty. It will have a default value of 0, because the user starts out with 0 credits. - credits_used: I will also store a running tally of how many credits the user has used. Maybe at a certain point they will earn free credits, just like every 7th cup of coffee at 7-11 is free. This will also be
INT2with a default value of 0 - auth_id: Finally, I have a UUID type. For the default value, click on the little hamburger menu with the tooltip of “Suggested expressions” We will use the first option of “
auth.uid()“, which pulls the user ID from the auth.users table, which will be used for the actual login process.
When you are done, it should look something like this:
Foreign keys
Next we are going to create a foreign key relationship for auth_id This isn’t strictly necessary since we are already setting it to a default of the uid from auth but by doing so, we can be assured that it isn’t accidentally overwritten somehow.
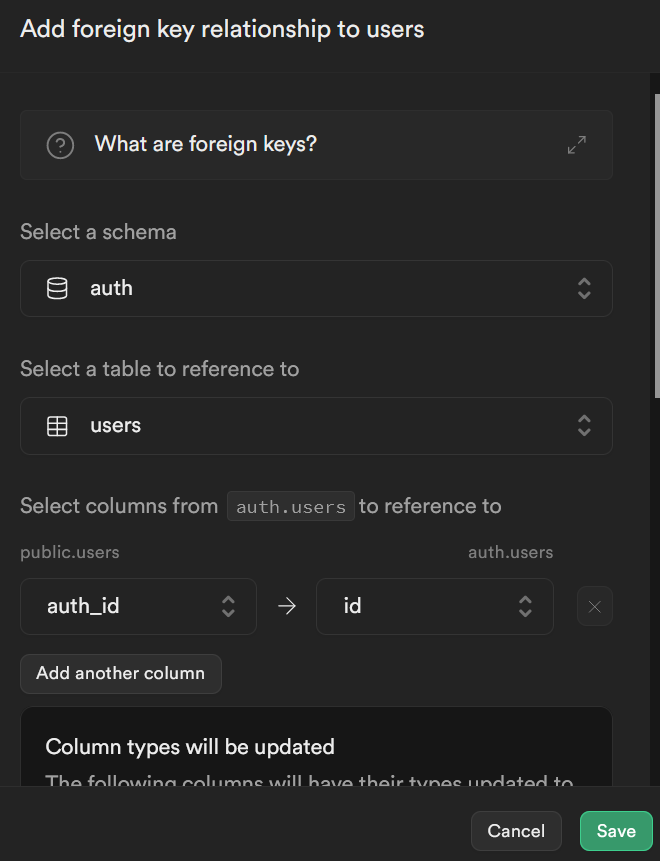
For the schema, we are going to select “auth“. The auth schema has all of Supabase’s private tables that handle authentication related tasks. The table we need is “users“
Next we want to select the auth_id column from public.users and the id column form auth.users. You will get a warning about the column type being updated, which won’t make sense, because it will tell you its being updated to UUID, and we already set it to UUID.
Scrolling down, we are asked what should be done if the referenced row is updated or deleted. One would assume that the UUID will never be updated, but the only option that doesn’t warn you of a potential error is “Cascade”, and when you have linked keys, you should be cascading changes unless you have a really good reason not to. Deletion is trickier. What happens if a user deletes their account? Under the rules of the European Union’s GDPR, that has to be an option we give people. Well, we also have to delete their personal data, too. So this should be Cascade as well. Account gets deleted, their entire row in the users table gets deleted.
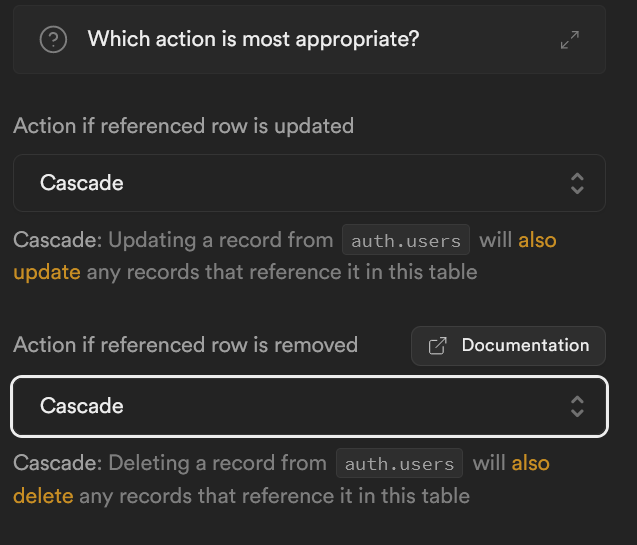
Click save to exit the foreign key view and then save again to save the table. Now we have a table!
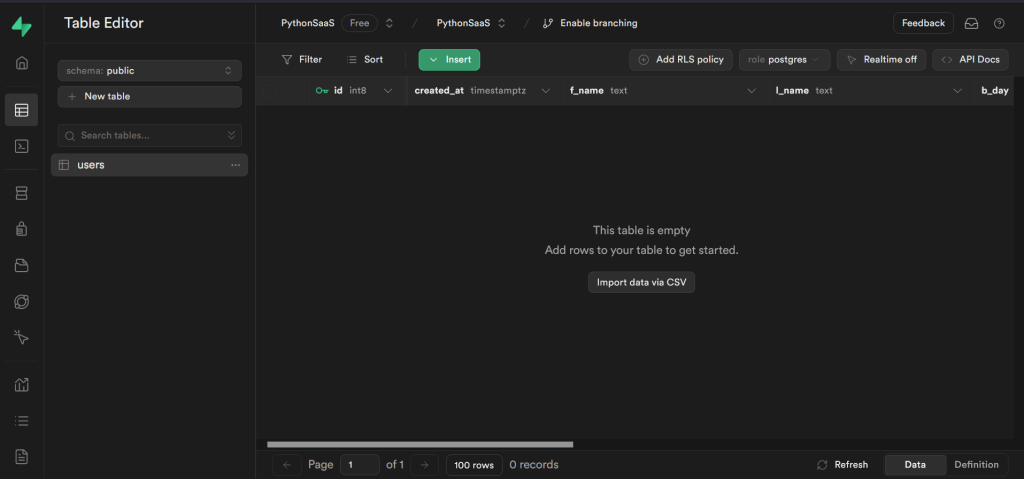
Next up, creating some RLS policies
To the right of our friend the green button, there is a button labeled “Add RLS policy”. Click on that. You will get a warning that Row Level Security is enabled for this table, but there are no policies set. So let’s change that.
Green button activate! (Click the “Create a new policy” button)
Create a Row Level Security Policy
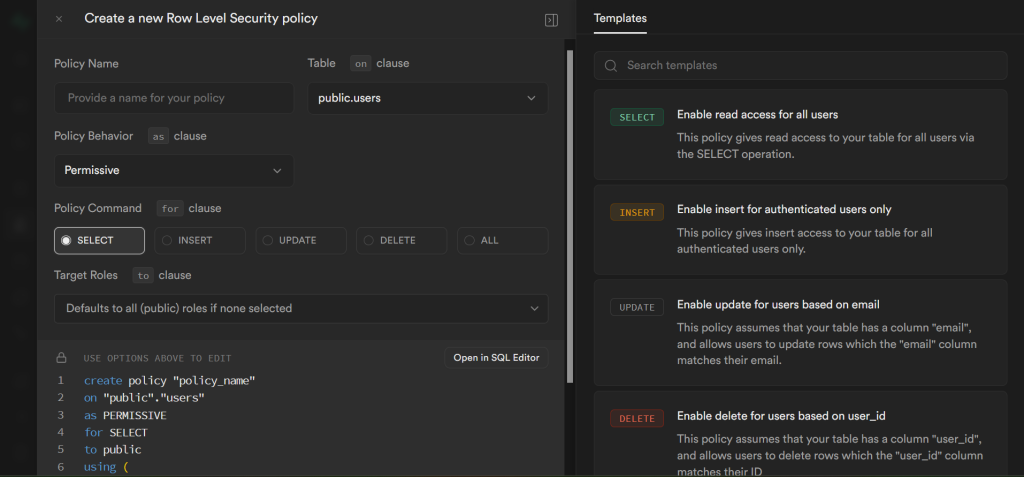
There’s a lot going on here, and it’s going to feel intimidating, but don’t worry. On the right side we have some templates. If you click on one, it will autofill the information on the left side. For instance, if you click on the template INSERT “Enable insert for authenticated users only” it will autofill the policy name as “Enable insert for authenticated users only” with the INSERT policy command selected and the target role of authenticated. It will even give us the actual SQL command that we will never actually need:
create policy "Enable insert for authenticated users only"
on "public"."users"
as PERMISSIVE
for INSERT
to authenticated
with check (
true
);
Except, we don’t actually need this policy. But we need something close. So click on the SELECT button and change the word “insert” in the policy name to “select”
This will give us a policy that allows our code to query the database and retrieve the user data once they are logged in. We also need to be able to update, but you can only select one command per policy. One option would be to choose ALL, but when it comes to security the best policy is a policy of least access.
There is a chance that changing the command will clear the check, and clicking save will result in an error. Don’t worry, just type true in line 7 and it’s good to go. Click save and you have your first RLS policy.
Row Level Security Policy #1
create policy "Enable select for authenticated users only"
on "public"."users"
as PERMISSIVE
for SELECT
to authenticated
with check (
true
);
Click the “create a new policy” button, and choose the same insert template, but this time change INSERT to UPDATE, and also change the word in the policy name. Now, once the user is logged in, we will be able to change the information on their row.
Row Level Security Policy #2
create policy "Enable update for authenticated users only"
on "public"."users"
as PERMISSIVE
for UPDATE
to authenticated
with check (
true
);
I’m not actually sure if this last one is necessary. I don’t think it is. But is also doesn’t hurt. For our third policy, we are specifically going to allow access for our service role key. For this one, we are going to change INSERT to ALL and then for the target role, change it to service_role.
RLS Policy #3 for service role
create policy "Enable all access for service role"
on "public"."users"
as PERMISSIVE
for ALL
to service_role
using (
true
);
We should now have three policies enabled for our users table. And like that we are ready to dive back into writing code!
For part two of our Supabase authentication, we are going to set up our Flask route to sign up a user, and automatically create their row in the users table, then another route to for logging in, and retrieving their data from the table to store in the session. And we can’t forget a logout route, either!

Leave a Reply